Greetings, fellow champions of child safety and aficionados of home decor creativity! 🌟🏡🚼
So, picture this: You’re a parent, and you know just how crucial those trusty baby gates are to shield your little explorers from staircase escapades. But hey, who says safety can’t be stylish? We often find ourselves on a quest for baby gates that not only keep our kiddos safe but also mesh seamlessly with our home’s aesthetics.
Now, cast your minds back to early 2017, a time when Britt and I scored a treasure trove of weathered pallet wood from a friend’s farm. Our grand plan? Crafting a cozy coffee bar in our basement. But life, as it often does, had more plans. Lo and behold, we ended up with leftover wood that eventually birthed a custom baby gate, all thanks to our darling daughter’s newfound crawling skills.
Now, before we dive into the nitty-gritty, let me lay it out for you – there are countless ways to tackle a project like this, and you can customize it to your heart’s content. Our journey began with a tape measure, as we sized up the gate opening and double-checked that our stash of reclaimed wood could cover the mission. For instance, if you’re looking to conquer a 3’x4′ space, you’ll need enough wood to deck out the front of the gate (that’s 12 square feet), plus a bit extra to fashion a sturdy frame on the backside to hold everything together.
I went old-school with the frame, embracing a timeless design featuring a rectangular outer frame and a single, heroic diagonal brace to ensure rock-solid stability once it all came together. Next stop, the local hardware emporium, where we handpicked the gate hardware – hinges, a trusty latch, a handle with character, and the bolts to keep it all locked and loaded. When choosing hinges, make sure they’re up to the task of supporting the wood you’ve got in mind. And as for bolts, I rolled with the standard 1/4″ variety, complete with washers and nuts – you’ll want at least three bolts per piece of lumber to keep that frame firm and friendly.
Back on the home front, I whipped out the trusty saw and began slicing and dicing, starting with the frame and then moving on to the vertical planks that would grace the gate’s front. The tricky diagonal piece? Saved it for last to ensure it fit like a glove, accounting for any quirks or twists in our prized reclaimed wood. Once the planks were ready, I transformed into a wood whisperer, using a belt sander to wipe away the remnants of outdoor life – think mold, mildew, dirt, and whatever else those boards had picked up on their farmyard adventures.
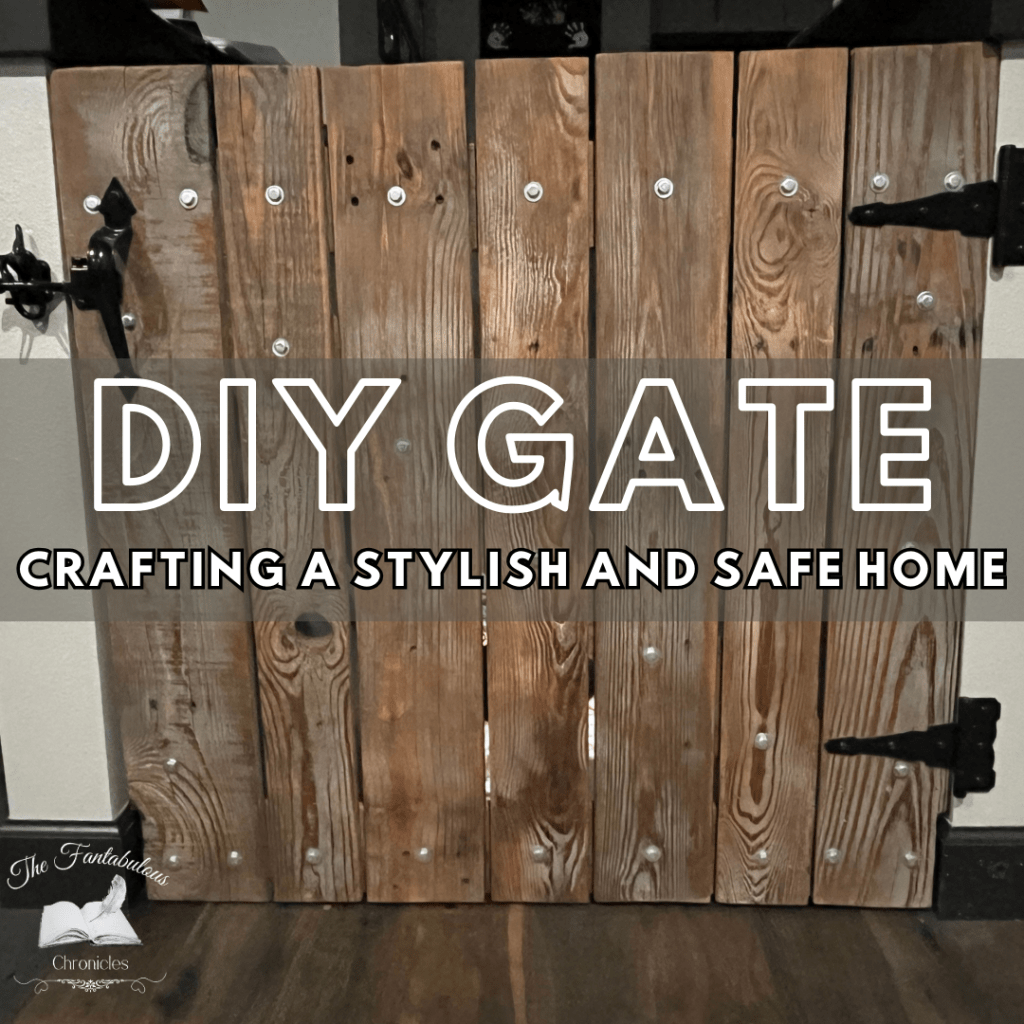
With our wood looking spiffy, I laid out all the pieces, conducting a test-fit ceremony to make sure they’d come together harmoniously. Once the trial run gave us the green light, I grabbed my drill and attached the planks to the frame. We started with the outermost vertical planks to ensure that the frame fit the original gate opening to a T. With the trusty 1/4″ bolts at the helm, everything got bolted in place, and I capped it all off with a bit of grinder magic to trim those bolt ends, leaving us with a gate that exuded sleek simplicity – bolt heads on one side, nuts on the other.
Now, for the grand finale, it was time to give our creation some extra pizzazz. Armed with spray polyurethane, we showered our gate in clear coats to protect and enhance the wood’s natural beauty. With our masterpiece ready for action, we mounted it on its hinges, used shims to get it perfectly positioned within the gate opening, and secured it in place. To add the finishing touches, we installed the handle and latch mechanisms, ensuring that our gate could stand strong and keep our adventurous little ones safely at bay, away from the lure of the stairway to unknown territories!
And there you have it, folks, a tale of DIY daring-do, style, and safety all rolled into one epic baby gate adventure! 🌟👶🔒
Have you been cooking up any exciting DIY projects in your world lately? We’re all ears and eager to hear about your creative endeavors! Share your latest ventures in the comments below. And if you’ve had a blast reading this or want to dive deeper into the world of DIY, don’t hesitate to reach out to us or hit that subscribe button to stay in the loop on all the fresh content we’re cooking up. Let the DIY adventures continue! 🛠️🎨🏡

Leave a comment