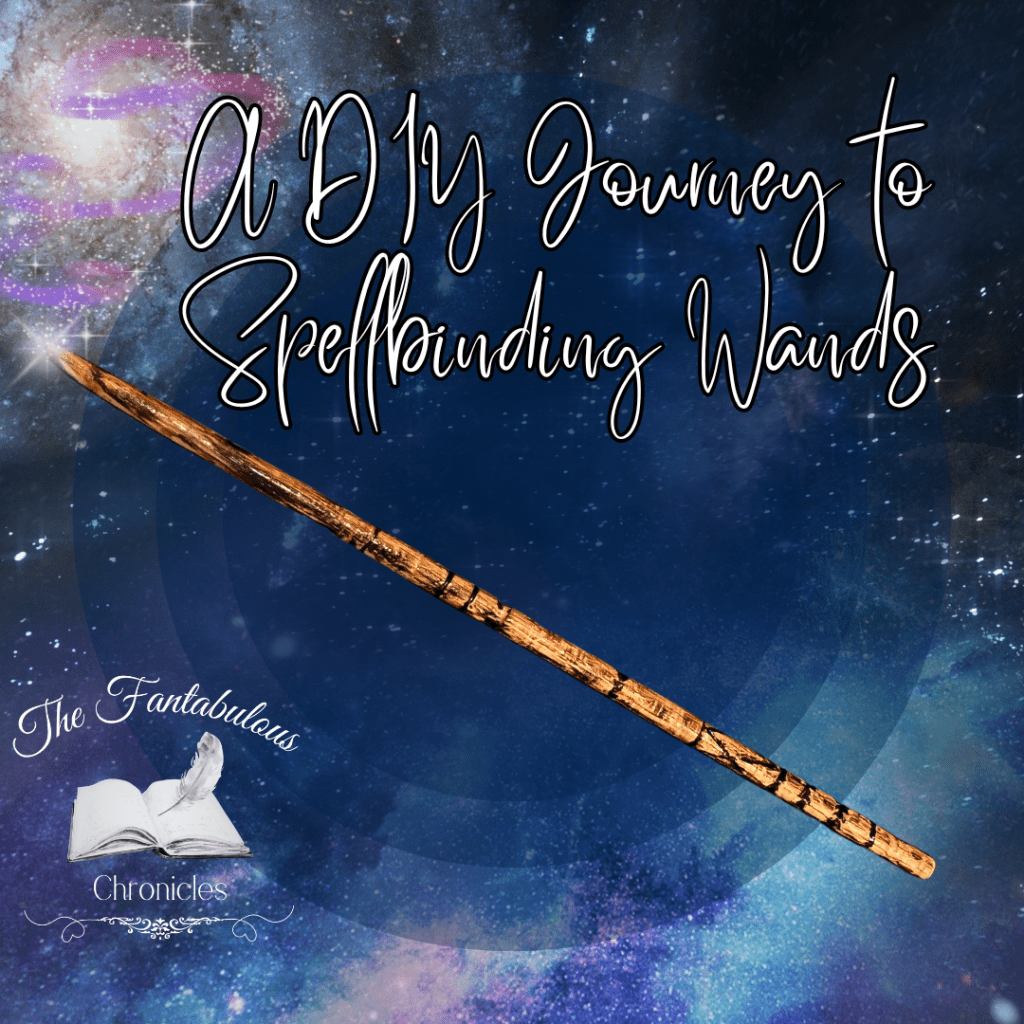
Navigating the notorious letter challenge – a weekly ritual where the mission is to scour our homes for items beginning with the designated letter for our children’s school showcase. Some letters pose no challenge, while others present a formidable puzzle! This week’s test was the elusive letter W, and our enchantment enthusiasts were eager to present a wand.
Despite possessing a few extraordinary wands from our Universal Studios expedition, we hesitated to dispatch a cherished collectible. Instead, we embraced the creative spirit and opted to craft a wand ourselves.
Estimated Time: 15-30 Minutes
Materials & Tools:
Small Dowel: Approximately 5/16″ Diameter & up to 16″ in length
Drill or wood lathe
Carving tools or Wood Chisel
Dremel with assorted bits (depending on the carvings desired)
Wood burner with fine tips
Torch or Lighter
Aerosol Mod Podge or Polyurethane (Glossy)
Sand Paper or Emery Cloth
Sander
Directions:
- Enter the realm of magical craftsmanship! If you’re fortunate enough to possess a wood lathe, the journey towards safety and enchanting results awaits you. However, fear not if, like me, you find solace in a standard drill. Begin by securing the dowel into the drill, akin to installing a mystical core.
- Hold your wand (or fasten it securely and liberate your hands from the drill’s grasp). Now, unleash your carving tools or, if not available, employ a wood chisel with the sharp end to weave the initial enchantments, carving delicate grooves that beckon the wand’s essence to emerge.
- As you etch the grooves, wield your power with caution, mindful of the dowel’s vulnerability, particularly if you rely on a drill without a guardian at the opposite end.
- The time has come to invoke the spirit of the Dremel! Utilize various bits, each with its unique charm, to unveil the intricate design dwelling within the wood. Exercise prudence, for even in the realm of crafting, balance is key.
- As the wand’s silhouette takes form, seize emery cloth, and with the drill at a moderate setting, commence the ritualistic sanding. Loop around the wand, weaving a dance with the cloth to caress the wood uniformly. Beware the speed of the drill and the cloth’s embrace, lest you disturb the harmony and risk a tumultuous encounter with your thumb.
- Survey the wand, scrutinizing the grooves; refine them if needed. Revisit the third step, circling back until the wand’s identity is crystalized.
- Now, the wand tip yearns for definition. Withdraw the dowel from the drill, invoking the power of the sander to bestow a taper upon the upper echelons of the wand. Return the wand to the drill, and with the finesse of emery cloth, mold the tip until it resonates with your vision.
- To illuminate the natural wood grain, summon a humble torch lighter. With graceful intent, let the flame dance upon the wand’s surface, allowing the grain to smolder and reveal a captivating interplay of darkened enchantment and ethereal streaks of wood.
- Channeling your inner sorcerer, wield the wood burner to inscribe arcane patterns onto the wand’s handle. Darken the grooves, breathe life into the wand, and watch as it awakens to its newfound identity.
- The grand finale approaches! Seize a can of glossy Mod Podge and anoint the wand with a swift coat. Witness the burn marks intensify, igniting the wand’s spirit into existence.
Behold, a bespoke wand stands ready for its sojourn to the realm of education! In conclusion, this mystical endeavor proved a triumph with the young apprentices. A swift and magical project, it bestowed upon us a respite amid the chaos, allowing us a moment of serene creativity and the joy of crafting something truly extraordinary for our cherished kin.

Leave a comment